Ambassador API GW and Keycloak integration

Ambassador API GW is an open source, Kubernetes-Native microservices API Gateway built on the Envoy Proxy.
Keycloak is an open source identity and access management solution. Keycloak supports OpenID Connect, SAML, OAuth2 and LDAP.
Ambassador supports authenticating incoming requests. When configured, Ambassador will check with a third party authentication service prior to routing an incoming request. An AuthService manifest configures Ambassador to use an external service to check authentication and authorization for incoming requests. Each incoming request is authenticated before routing to its destination.
In this blog we will be using Keycloak as our IAM solution and integrating it with Ambassador API GW. After integrating Keycloak with Ambassador, incoming API requests will be redirected to Keycloak login page for authentication before allowing access to those APIs.
Prerequisites:
- Ambassador API GW is deployed and listening for API requests. Follow the official instructions.
- httpbin example application is configured for the URL:
http://<Ambassador URL>/httpbinYou can follow the instructions mentioned here. - Make sure
http://<Ambassador URL>/httpbinis routed through Ambassador API GW and it should openhttpbin.orgwebsite.
Note: In some of the commands below, you need to substitute relevant IP or URL for Keycloak and Ambassador. You will find them in this notation: <Ambassador IP-or-URL>, <Your-Keycloak-IP-or-URL>. Similarly there are other variables in < > which you need to substitute before running those commands.
Set up Keycloak
Use your existing keycloak setup if you already have. If not you can start one quicky using below instructions.
Please note that below keycloak setup is not secure and is used only for testing the Ambassador-Keycloak integration. Do not use this in production. Use it at your own risk.
For testing purposes docker version of keycloak will be used for this demo.
docker run -e KEYCLOAK_USER=<add-your-keycloak-user> \
            -e KEYCLOAK_PASSWORD=<keycloak-password> \
                                  -p 0.0.0.0:80:8080 \
                                -itd --name keycloak \
                                      jboss/keycloak
Above command will start keycloak on your Linux machine. It will set admin username, password and binds keycloak to port 80. This setup uses keycloak’s default H2 DB, which should not be used in production. Note your IP address.
Login to Keycloak by visiting http://<your-ip> in your browser. Use the username and password supplied in the docker run command to login to Keycloak.
Use the existing “master” realm. Create a client and a user for our testing purposes.
Click on Clients -> Create. Create button is on the right side of the page.
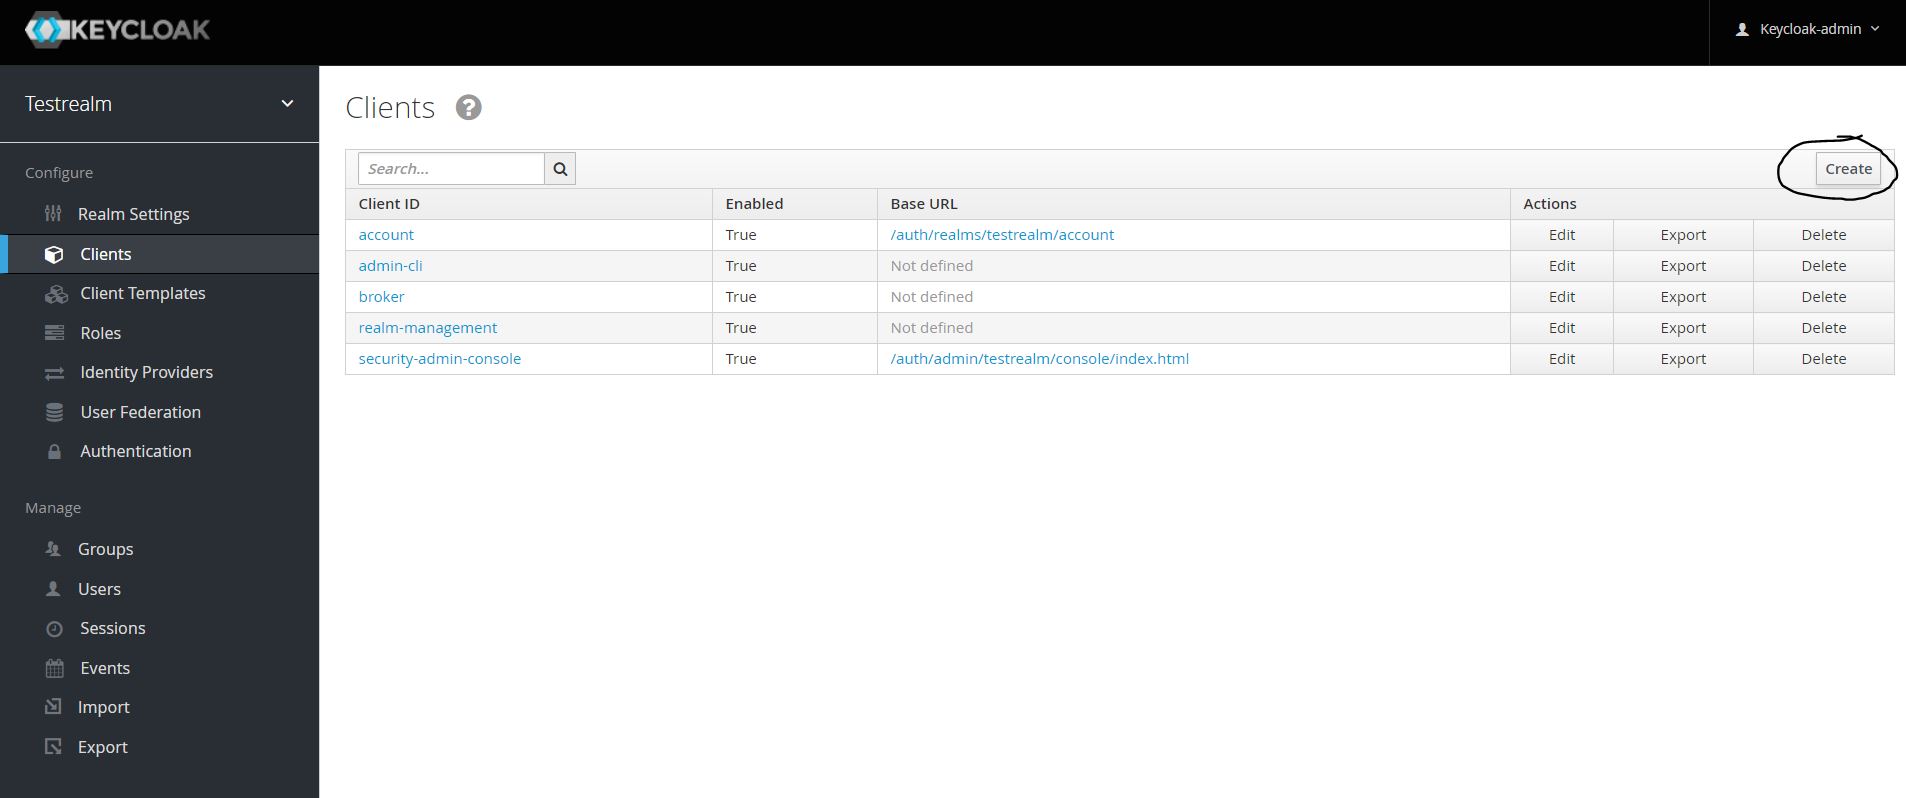
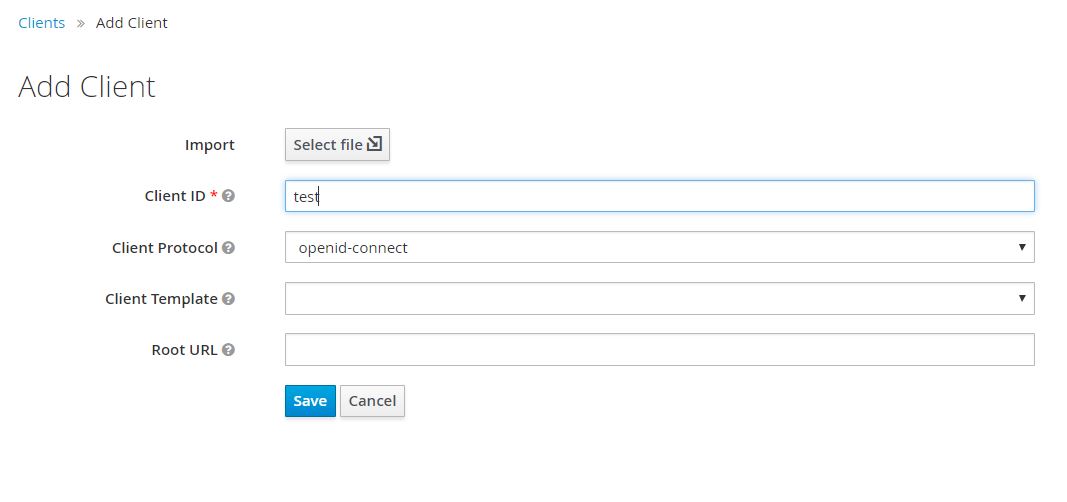
Add Client ID as test. Select “Client Protocol” as “openid-connect”. You can leave other fields empty. Click Save.
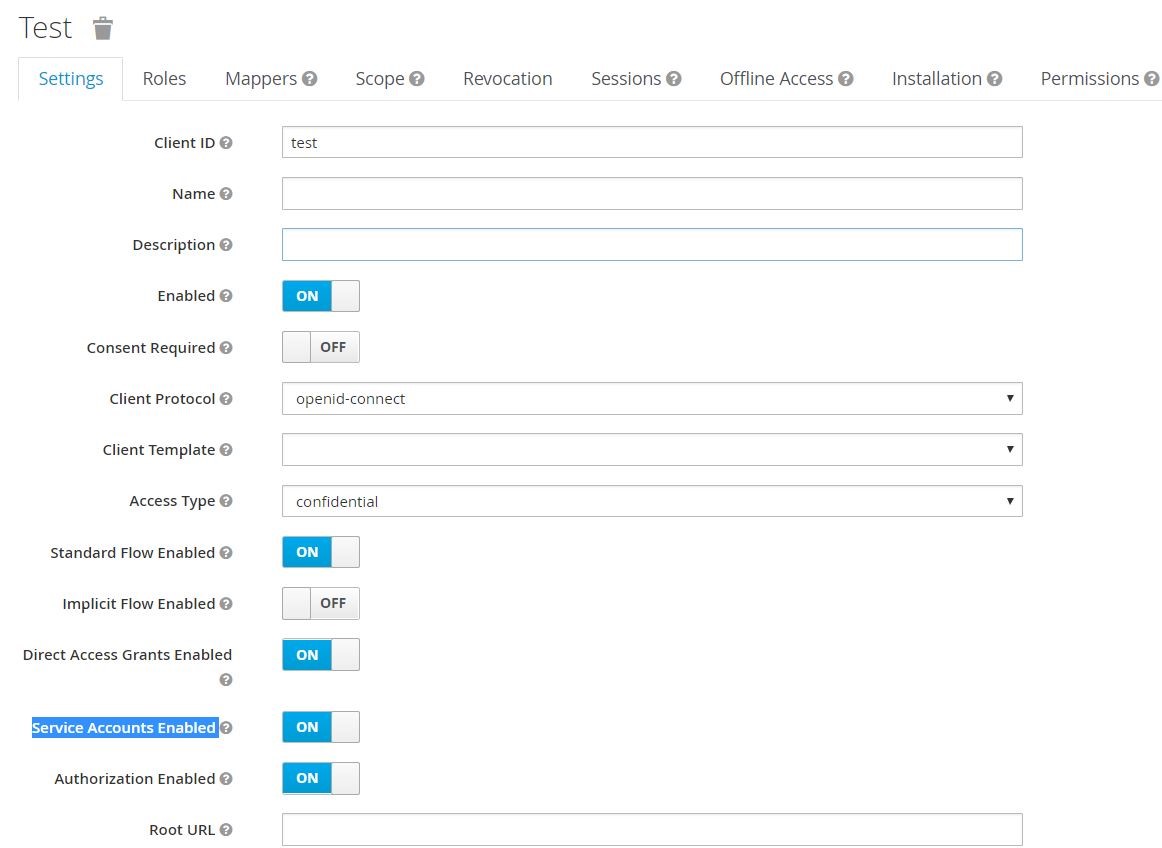
After saving, a new window will open with more details. Turn On Authorization Enabled option. It will automatically turn On Service Accounts Enabled option. Leave it like that.
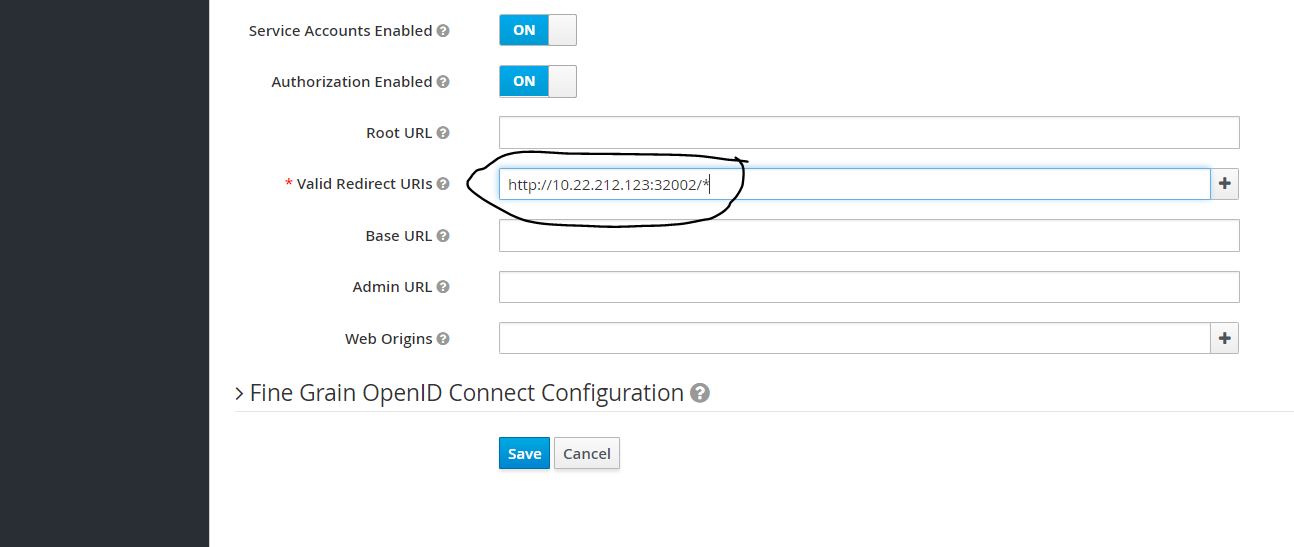
Fill Valid Redirect URIs with http://<Ambassador URL>/*. Click Save.
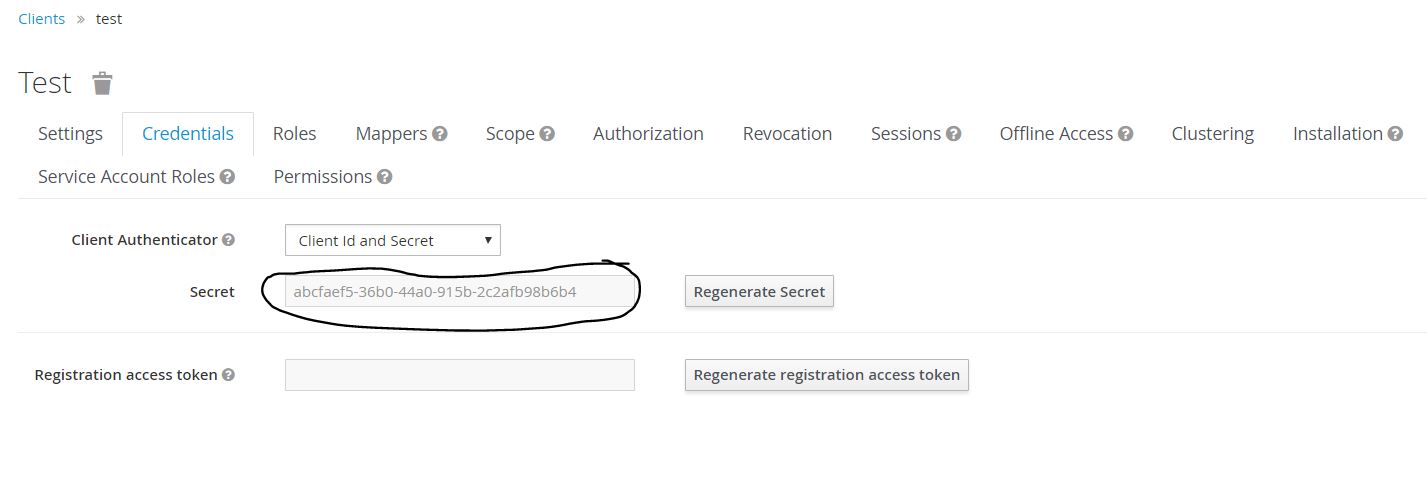
On the same page, go to Credentials tab as shown below. Note the secret which is needed when creating “ambassador-auth-client-secret” in the next section. Use it wherever <YOUR_OIDC_CLIENT_SECRET> is mentioned.
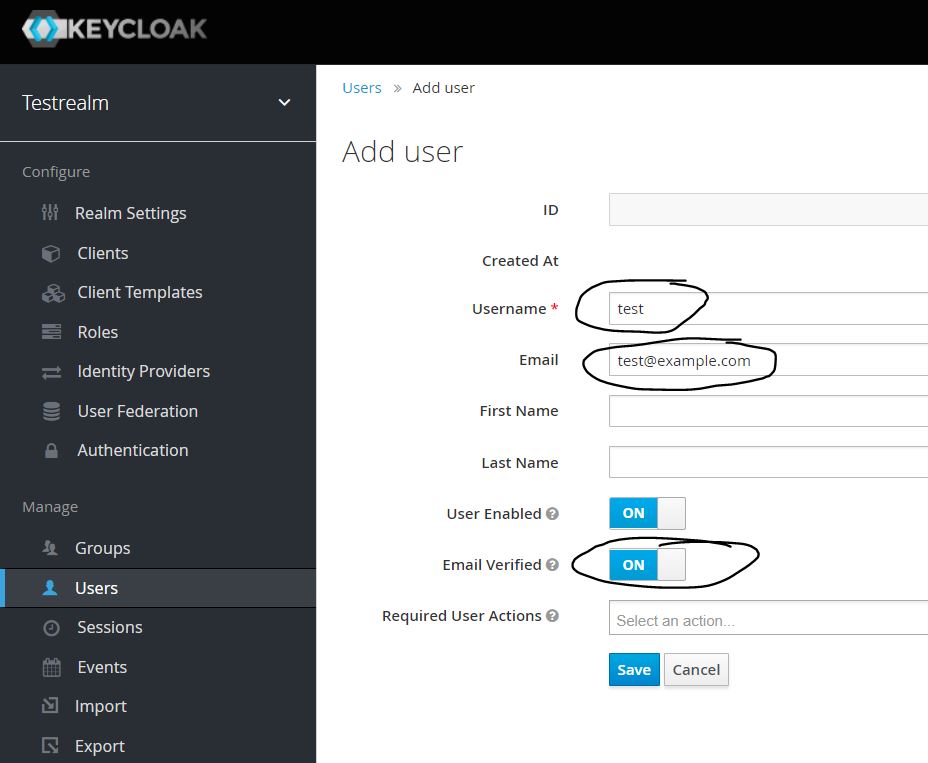
Click Users section on the keycloak page, to create users. Add username, email and select email verified. Click Save.
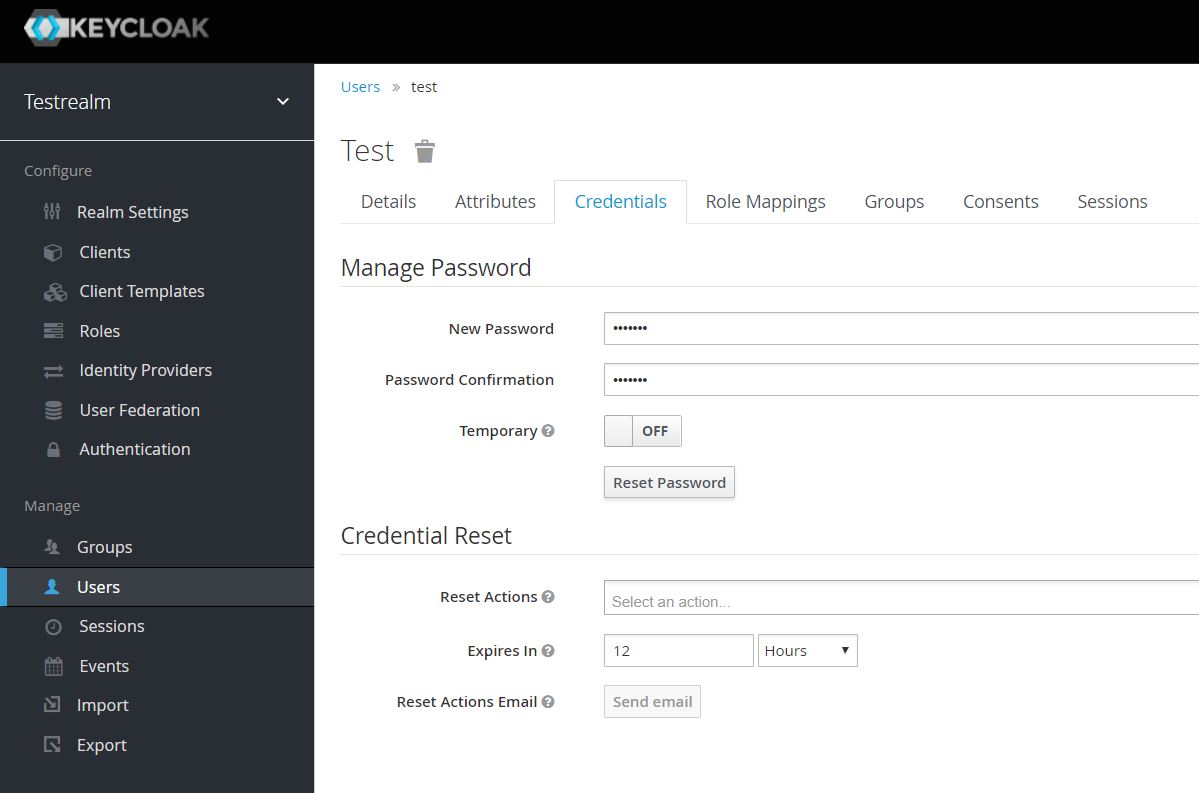
In the same page, go to Credentials tab. Set the new password, and turn Temporary to Off.
Click Reset Password.
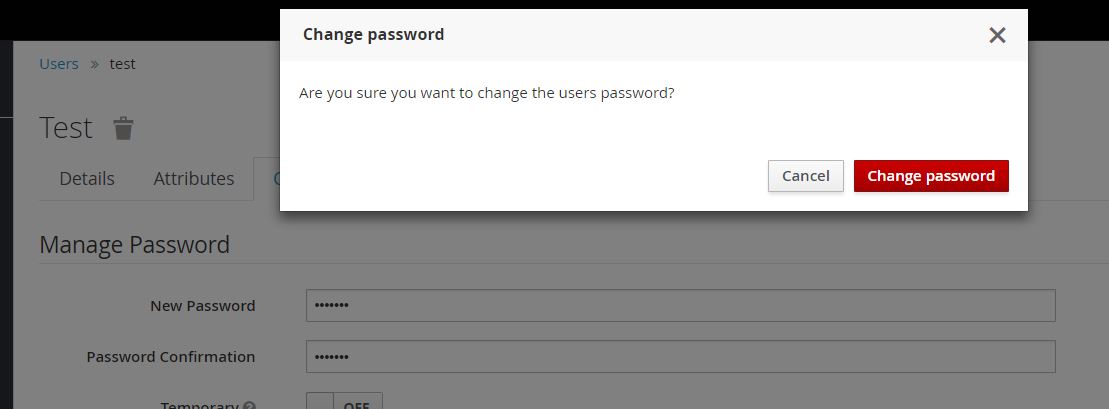
When dialog window opens click Change Password.
Note: Please note that this is done only for testing ambassador-keycloak integration. Please do not do this in production or in any setup. Follow these instructions at your own risk.
Now go back and click Users section in Keycloak. In the Users page, click “View all Users” and you should see the newly created user.

Setup OIDC Auth integration with Keycloak
Thanks to Antti Myyra for developing Ambassador-Auth-OIDC, which will be used to integrate Keycloak with Ambassador API GW.
Run below commands to clone ambassador-auth-oidc. Below you can choose to run it either in docker or in k8s. Don’t run both.
git clone https://github.com/ajmyyra/ambassador-auth-oidc.git
cd ambassador-auth-oidc/
Running ambassador auth In Docker
Use these instructions if your Ambassador API gateway is running as docker container and not in k8s.
Above setup is running keycloak as docker container and listening on port 80. Below ambassador-auth-oidc docker container will listen on port 8080.
docker run -p 0.0.0.0:8080:8080 \
      -e OIDC_PROVIDER="http://<Your-Keycloak-IP-or-URL>/auth/realms/master" \
      -e SELF_URL="http://<Ambassador IP-or-URL>:8080" \
      -e OIDC_SCOPES="profile email" \
      -e CLIENT_ID="test" \
      -e CLIENT_SECRET="<YOUR_OIDC_CLIENT_SECRET>" \
      ajmyyra/ambassador-auth-oidc:1.3
Running Ambassador Auth in Kubernetes
Use this setup if you are already running Ambassador API GW in K8s. Make sure Ambassador API GW is up and running before creating secrets.
kubectl create secret generic ambassador-auth-jwt-key --from-literal=jwt-key=$(openssl rand -base64 64|tr -d '\n ')
kubectl create secret generic ambassador-auth-redis-password --from-literal=redis-password=$(openssl rand -base64 20)
kubectl create secret generic ambassador-auth-oidc-provider --from-literal=oidc-provider="http://<Your-Keycloak-IP-or-URL>/auth/realms/master"
kubectl create secret generic ambassador-auth-self-url --from-literal=self-url="http://<Ambassador IP-or-URL>"
kubectl create secret generic ambassador-auth-client-id --from-literal=client-id="test"
kubectl create secret generic ambassador-auth-client-secret --from-literal=client-secret=<YOUR_OIDC_CLIENT_SECRET>
kubectl get secrets # To confirm they've been created
Run below commands in the root directory of ambassador-auth-oidc. This will start the ambassador-auth-oidc container on K8s.
cd ambassador-auth-oidc/
cp misc/auth-deployment.yaml.example auth-deployment.yaml
cp misc/auth-service.yaml.example auth-service.yaml

kubectl create -f auth-deployment.yaml
kubectl create -f auth-service.yaml
Make sure ambassador-auth-oidc is up and running. Also check the logs to make sure everything is alright.
Now go to http://<Ambassador IP-or-URL>/httpbin.
It should automatically redirect you to Keycloak page for logging in.
Enter your “test” user credentials. After successful login it should automatically redirect you to http://<Ambassador IP-or-URL>/httpbin page.
We have successfully integrated Keycloak with Ambassador API GW and tested API Authentication.